Situation: the client has some windows servers running hypervisor. After they installed Windows updates, the VMs can’t start and Event ID 15350: The virtualization infrastructure driver (VID) is not running.
Resolution: This is knowing issue. Windows 2022-01 Security update may cause this problem. Microsoft has released an option update KB3013769. Install the option update should fix the problem.
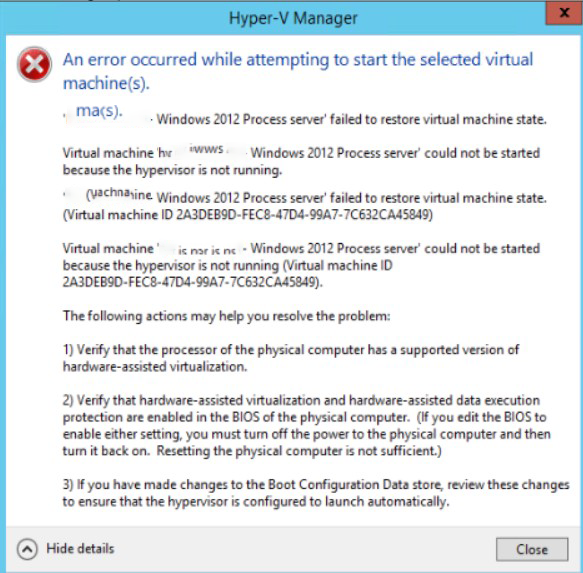
Situation: the client has some windows servers running hypervisor. After they installed Windows updates, the VMs can’t start with “the hypervisor is not running” message
Resolution: This is knowing issue. Windows 2022-01 Security update may cause this problem. Microsoft has released an option update KB3013769. Install the option update should fix the problem.
Situation: the client has some windows servers running hypervisor. After they installed Windows updates, the VMs can’t start with Saved status.
Resolution: This is knowing issue. Windows 2022-01 Security update may cause this problem. Microsoft has released an option update KB3013769. Install the option update should fix the problem.
Situation: The client needs to re-install the OneDrive. After that, he has two OneDrive folders under his profile or C:\Users\blin. The problem is he can’t delete the old OneDrive folder.
Resolution:
Restart File Explorer: Open Task Manager > Processes > Windows Explorer > Right click then Restart
Reset File Explorer: Open Task Manager > Processes > Windows Explorer > Right click then End task , Open Run window, Windows + r from the keyboard then run explorer.exe
Unlink all OneDrive accounts
Move the corrupted OneDrive folder to the desktop then delete folder or you may just delete the folder thru CMD:
Run CMD as administrator > del + file path (del C:\Desktop\Lightroom)
Situation: After the client installed Adobe Acrobat Pro DC on Windows 10 or 11, he find it doesn’t have Adobe PDF printer.
Resolution 1: Run repair installation.
Open Adobe Acrobat. Click on Help and then Repair Installation.
Resolution 2: Download and install Adobe patch or update
Please refer to this article: Problem: Adobe PDF printer does not get installed with fresh Acrobat installation – https://helpx.adobe.com/acrobat/kb/adobe-pdf-printer-does-not-install.html
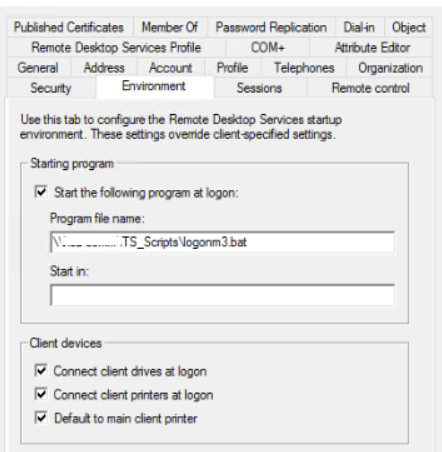
Situation: The client has been running Remote Desktop Services for users to run an auto-start application remotely. It works on Windows 2008 R2 and 2012 R2 Server. However, it doesn’t work on Windows 2016 and 2019 server. This is Starting program settings in User’s Environment.
Cause: This is because of the changes to RCM on Windows 20126 and 2019. Quoted from Microsoft article: Changes to Remote Connection Manager in Windows Server 2016
Changes to RCM
In Windows Server 2012 R2 and earlier versions, when a user logs on to a terminal server, the RCM contacts the domain controller (DC) to query the configurations that are specific to Remote Desktop on the user object in Active Directory Domain Services (AD DS). This information is displayed in the Remote Desktop Services Profile tab of the users object properties in the Active Directory Users and Computers MMC snap-in.
Starting in Windows Server 2016, RCM no longer queries the user object in AD DS. If you require RCM to query AD DS because you are using the Remote Desktop Services attributes, you must manually enable RCM. For more information about this by-design behavior in Windows Server 2016, see RCM behavior in Windows Server.
Additionally, consider the following scenario:
You install Windows Server 2016 with the Remote Desktop Session Host role.
You configure a local user account to start an application during logon. You do so by using the Local Users and Groups tool in Computer Management.
In this scenario, you expect the user to be presented with the application in the Remote Desktop Session only. However, by default in Remote Desktop Session Host (RDSH) in Windows Server, a full Remote Desktop Session is presented, and the application setup process in the profile doesn’t start.
Resolution: Also quoted from the same article:
To revert to the earlier (pre-Windows Server 2016) behavior, here’s what to do:
If the server has the RD Session Host Role installed, apply the following registry keys to enable the RCM legacy model. It triggers an Active Directory query to check for RDP profile settings:
Path: HKEY_LOCAL_MACHINE\SOFTWARE\Policies\Microsoft\Windows NT\Terminal Services and HKEY_LOCAL_MACHINE\SYSTEM\CurrentControlSet\Control\Terminal Server\WinStations\<Winstation name>\
Name: fQueryUserConfigFromDC
Type: Reg_DWORD
Value: 1 (Decimal)
Then, restart the Remote Desktop Service. If the server doesn’t have the Remote Desktop Service role installed, you must set up an extra registry key: HKEY_LOCAL_MACHINE\SYSTEM\CurrentControlSet\Control\Terminal Server
Situation: when you attempt to change the time zone on Windows 2019 Server, you may receive this message: Unable to continue. You do not have permissions to perform this task.
Resolution 1: Login local administrator account and make the change.
Resolution 2: run timedate.cpl Powershell command and make the change.
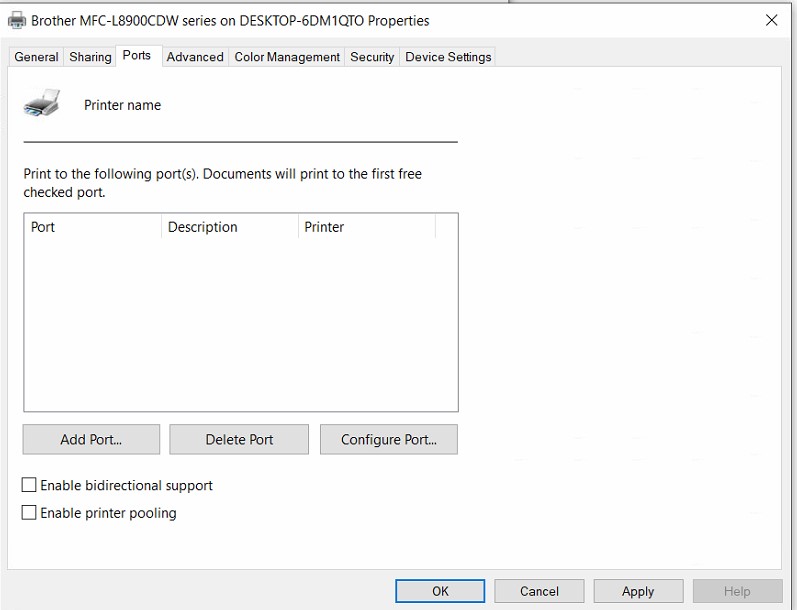
Situation: After a Windows update, you have a problem to printer to a network printer. When you check the Printer Ports, it is empty, and no printer ports listed.
Resolution 1: Disable Print Spooler RPC encryption on both printer server and client
Some Windows update may add more security features and enable the RpcAuthnLevelPrivacyEnabled Registry which key is set to and Windows automatically encrypts RPC communication with network printers on the Windows OS. If shared printer server and client are in different level of Windows Edition, group such as domain, workgroup or home, the client may not be able to add the shared printer even you can see it. Disable the RpcAuthnLevelPrivacyEnabled (which set key to 0) may get rid of error code 0x0000011b. Here is how.
Run the Registry Editor by typing regedit on search bar.
Navigate to HKEY_LOCAL_MACHINE\System\CurrentControlSet\Control\Print.
Right-click on the Print key and select New→ DWORD-32 bit Value.
Enter the new key RpcAuthnLevelPrivacyEnabled.
Double-click on the new key and set its value to 0 (zero).
Restart your computer, and check if it connects to your printer.
Note: you need to do that on both printer server and client.
2. Resolution 2: Manually Add the Printer
Go to Windows icon>Settings.
Click on Bluetooth and Devices.
click on Printers and Scanners.
Then click on the Add device button to add a printer or scanner.
Follow the wizard to add the printer.
Resolution 3: Uninstall Recent Windows Updates
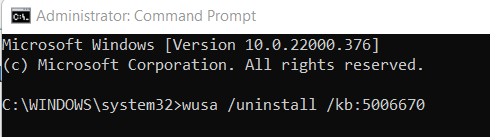
this is an example how to uninstall KB5006670 by following this steps:
In the search bar next to the Start menu, type cmd
Run Administrator Command Prompt
A pop-up will appear, asking if you want to allow changes to be made. Click ‘Yes’
4. Enter this command: ‘wusa /uninstall /kb:5006670’ and press Enter


