Situation: The client has Veeam backup problem with this error:
[29.07.2021 06:52:31] <04> Error Unable to establish authenticated client-server connection.
[29.07.2021 06:52:31] <04> Error A call to SSPI failed, see inner exception. (System.Security.Authentication.AuthenticationException)
[29.07.2021 06:52:31] <04> Error at System.Net.Security.NegoState.StartSendAuthResetSignal(LazyAsyncResult lazyResult, Byte[] message, Exception exception)
[29.07.2021 06:52:31] <04> Error at System.Net.Security.NegoState.StartSendBlob(Byte[] message, LazyAsyncResult lazyResult)
[29.07.2021 06:52:31] <04> Error at System.Net.Security.NegoState.StartSendBlob(Byte[] message, LazyAsyncResult lazyResult)
[29.07.2021 06:52:31] <04> Error at System.Net.Security.NegoState.ProcessAuthentication(LazyAsyncResult lazyResult)
[29.07.2021 06:52:31] <04> Error at System.Net.Security.NegotiateStream.AuthenticateAsServer(NetworkCredential credential, ProtectionLevel requiredProtectionLevel, TokenImpersonationLevel requiredImpersonationLevel)
[29.07.2021 06:52:31] <04> Error at Veeam.EndPoint.Core.CForeignInvokerServer.AuthenticateAsServer(Socket client)
[29.07.2021 06:52:31] <04> Error No authority could be contacted for authentication (System.ComponentModel.Win32Exception)
Troubleshooting: From the log (C:\ProgramData\Veeam\Endpoint\Agent_Backup), we also find: Error [ProxyThrottling] Error while setting throttling, sourceIPs [10.255.255.59,10.255.255.58,10.0.0.104], targetIPs [10.0.0.92]. The target server is multihomed server with two Networks connections (10.255.2550/24 for SAN and 10.0.0.0/16 for LAN).
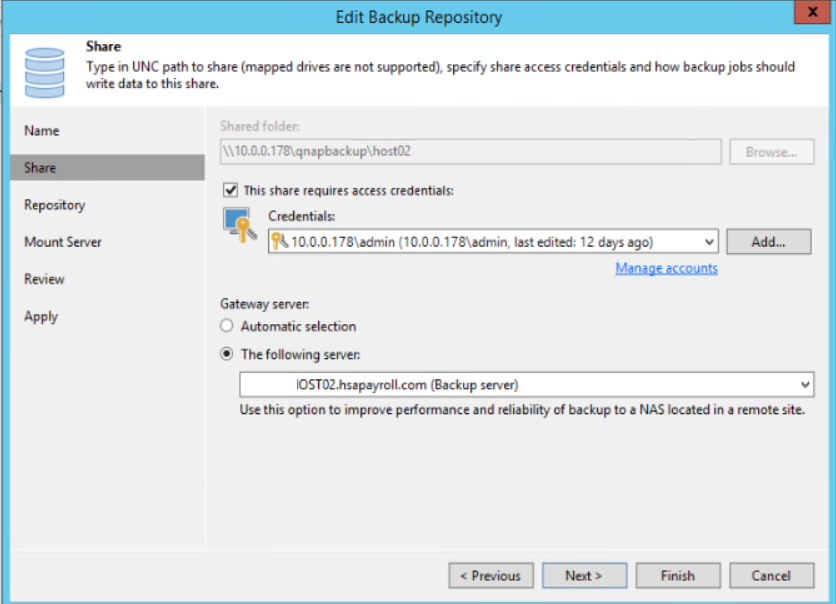
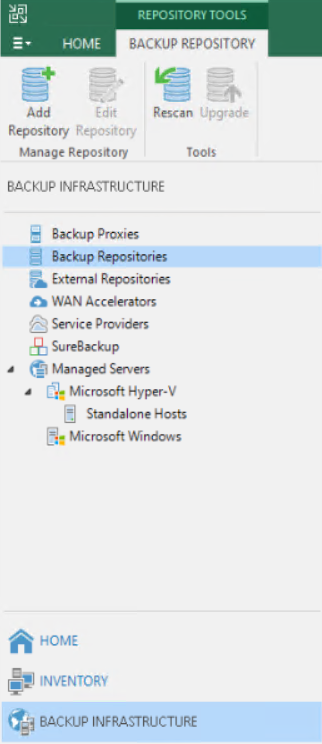
Resolution: Disable Automatic selection in Backup Repository and change it to The following server.