Situation: The user receives this message when running Chrome: Chrome – Bad Image: chrome.dll is either not designed to run on Windows or it contains an error.
Troubleshooting: re-installing Chrome fixes the problem.
Situation: The user receives this message when running Chrome: Chrome – Bad Image: chrome.dll is either not designed to run on Windows or it contains an error.
Troubleshooting: re-installing Chrome fixes the problem.
Situation: The user can’t print. When checking the status of the printer, it shows Offline.

Troubleshooting: Check the printer server and test, it works. Restarting the Printer Spooler in problematic computer fixes the problem.
Situation: After configuring third party certificate on a Palo Alto Firewall HA, the client has a problem to Synchronize HA Peer,
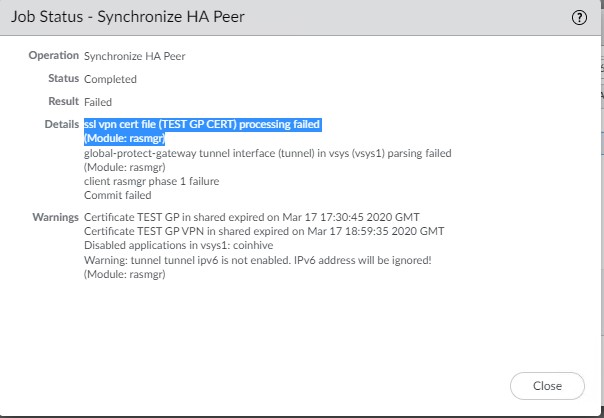
Resolution 1: Export Certificate from the Active unit and import it into the Passive unit. Go to Device>Certificate Management>Certificates. Highlight the certificate and click the Export Certificate.
![]()
Resolution 2: If you can’t sync and Peer unit has been changed for some reasons, you may want to Revert to last Saved confirmation on Perr unit.
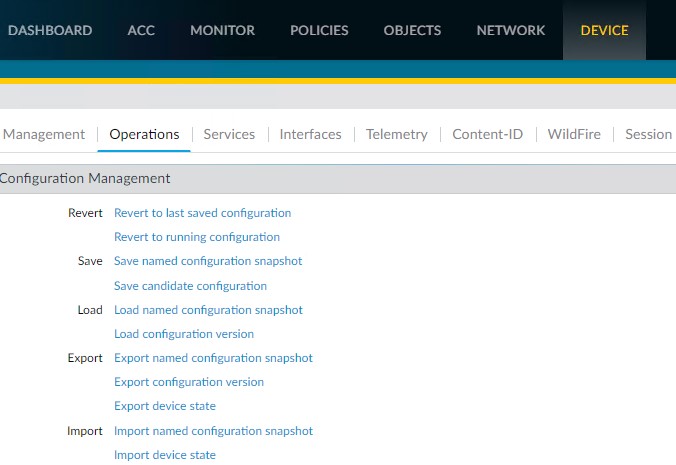
Resolution 3: You can also Export named configuration snapshot on Active unit and import it on Passive unit.
PA Support sumery.
1. We discussed the issue, which is about the issue HA pair out of sync.
2. We checked that the passive firewall is out of sync.
3. We tried to sync but as it’s due to a certificate we could not sync it.
4. We exported the certificate from the active firewall using the passphrase.
5. We then imported the certificate into the passive firewall using the passphrase.
6. We then checked the firewall which was out of sync.
7. We then tried to sync but were not syncing.
8. We tried with management restart but could not sync again.
9. We then took the Active firewall running configuration.
10. We then imported and loaded the running configuration of the active firewall in passive.
11. We then did the commit after that we can see that the HA pair are in sync.
Situation: When attempting to Synchronize in PA High Availability on PA Firewall, you may receive this message: Other Administrators are holding device wide commit locks.
Resolution 1: Click Locks icon to Remove the Lock. If you don’t see any one in the Locks, please check it on the Passive unit.
Resolution 2: You may run these command:
You can check to see the admins who have a commit lock via the UI or CLI:
> show commit-locks
Commit locks are designed to prevent any other logged in admins (even other superusers) from doing a commit until the lock is released. If you’re a superuser, and you see commit locks from the CLI command above, you can clear them with:
> request commit-lock remove
Situation: The client just created a new self-assigned certificate for Paloalto Firewall VPN. But it doesn’t work.

Troubleshooting: You need to add the new certificate to Gloableprotect Portals. Go to Network>GloableProtect>Portals>
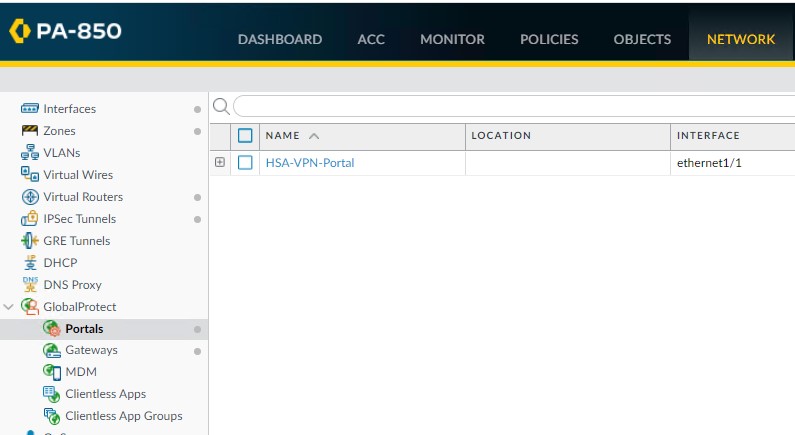
Select the VPN portal. Go to Agent.

Click Add under Trusted Root CA and then add the self-assigned certificate.
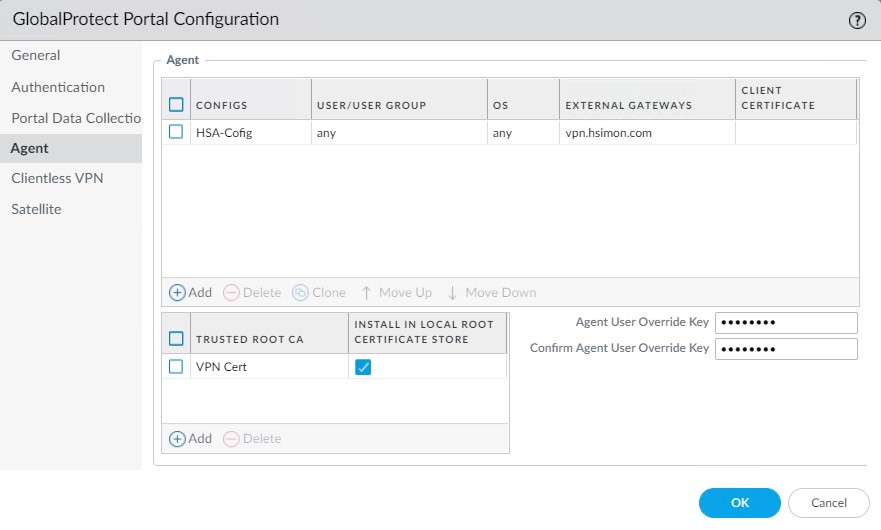
It looks like this.

Situation: The client has been using self-assigned certificate. They just imported third party certificate.
![]()
However, it doesn’t work. It still shows using self-assigned certificate.
Troubleshooting: You need to add the new certificate to SSL/TLS Service Profile. SSL/TLS Service Profile>SSL Profile.
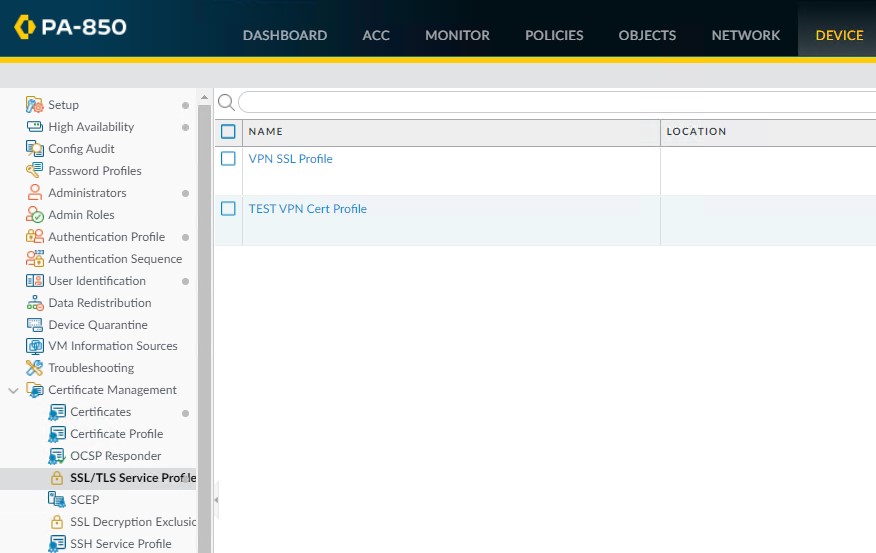
In Certificate select the new certificate you just imported.
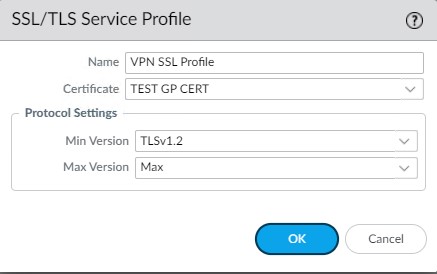
It should look like this:

PA Support summery
1. We discussed the issue, which is about the issue of importing the certificate into the passive firewall.
2. We checked that the passive firewall is out of sync.
3. We tried to sync but as it’s due to a certificate we could not sync it.
4. We exported the certificate from the active firewall using the passphrase.
5. We then imported the certificate into the passive firewall using the passphrase.
6. We then checked the firewall which was out of sync.
7. We then tried to sync but were not syncing.
8. We tried with management restart but could not sync again.
9. We then took the Active firewall running configuration.
10. We then imported and loaded the running configuration of the active firewall in passive.
11. We then did the commit after that we can see that the HA pair are in sync.
Situation: The client uses Microsoft 365. One of the users can’t login with User in risk message.
Troubleshooting: You may need to dismiss user risk. To do that, login Azure. Search Dismiss user risk.
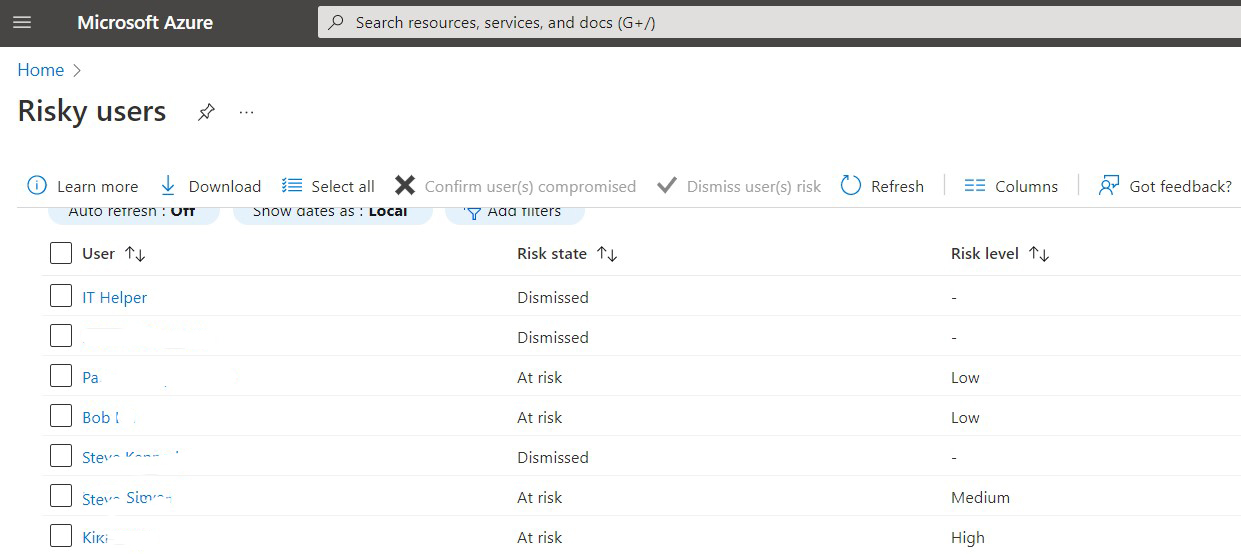
Highlight the user and click on Dismiss user(s) risk.

Situation: The client uses Microsoft 365. One of the users can’t get her verification code no matter she try email or phone.
Troubleshooting: You may need to dismiss user risk. To do that, login Azure. Search Dismiss user risk.
Highlight the user and click on Dismiss user(s) risk.
Situation: The client is running Windows server 2019. When he tries to take over owner on one of the folders with “Replace all child object permissions entries with inheritable permission entries from this object.’ option checked, he gets this message: ‘Failed to enumerate objects in the container. Access is denied’
Resolution 1: Use takeown command, for example
takeown /f * /r /d y
Resolution 2: propagate the owner
propagate the owner, then close out of ALL dialogs, before you propagate the actual permissions.
I can’t really say how it got messed up, but this should fix it. These steps are a bit involved, but just take it step-by-step (some users print them and mark off what step they’ve done). If you get stuck, just let me know what step you’re on.
Note: We find we need to run takeown /f * /r /d y on each level of the folder or each subfolders.
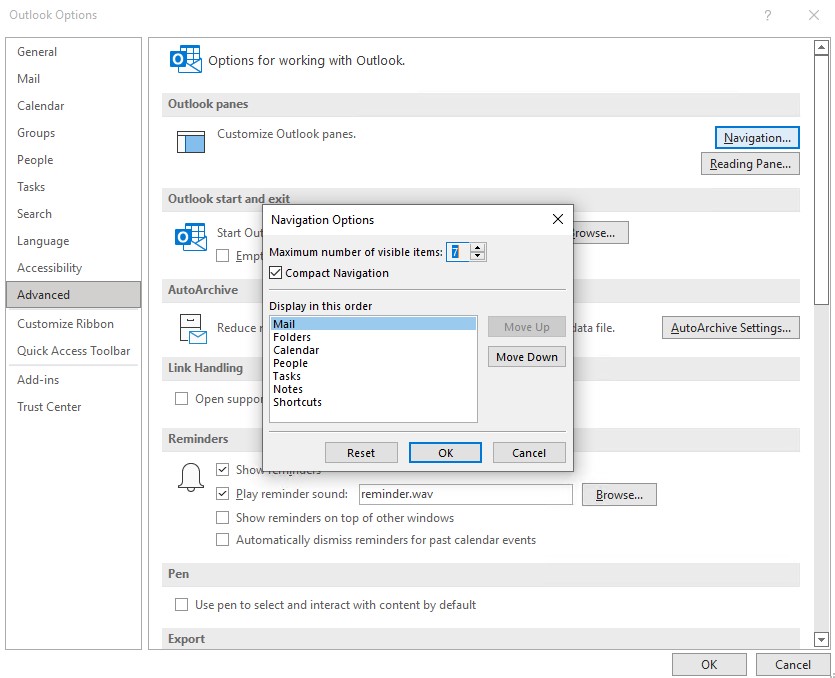
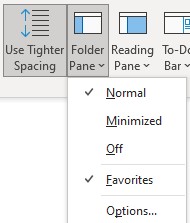
Situation: The user can’t see the Navigate Bar in her Outlook.
![]()
Resolution 1: Make sure the Folder Panel is not off.
Go to View>Folder Panel and make sure it is not Off.
Resolution 2: Check the Navigation Option settings by going to File>Options>Advanced>Navigation Option.