Veeam Error: Cannot find available gateway server for repository

Situation: The client just upgraded their Veeam V11 to V12. the upgrade is successful. However, the backup doesn’t work with this error: Resource not ready: gateway server. Unable to allocate processing resources. Error: Cannot find available gateway server for repository.

Resolution 1: Please refer to this post:

Resolution 2: If resolution fixed “Resource not ready: gateway server” but you still receive “Unable to allocate processing resources. Error: Cannot find available gateway server for repository.” you may want to re-configure Gateway Host.

  1. Go to Backup Infrastructures. Click on Backup Repositories and then select the backup repository.
  2. In Share, switch Automatic selection to The following server.

3. Select Use the following gateway server only and check the server you prefer to use.

4. Click on Finish and test the backup.

Resolution 3: Re-create backup Repository.


Veeam error: Resource not ready: gateway server

Situation: The client just upgraded their Veeam V11 to V12. the upgrade is successful. However, the backup doesn’t work with this error: Resource not ready: gateway server.

Resolution: It could be Veeam Backup Proxy configuration. Go to Backup Infrastructures. Click on Backup Proxies. By the default, Max concurrent tasks is 2. You may want to increase for a test.


Can’t login becasue Your organization has deleted this device with error code 700003

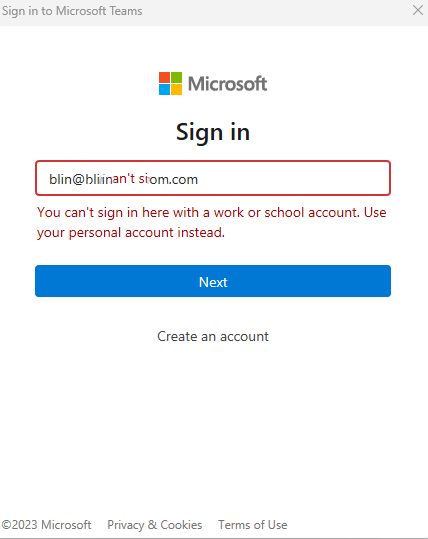
Situation: you may receive this message when login office 365: Your organization has deleted this device with error code 700003

Resolution 1: Login Office.com to use online Office apps.

Resolution 2: Disconnect the problematic account

Disconnecting the account that triggered error 70003 is another quick solution that could potentially solve this problem.

  1. Open the Settingsapp
  2. Go to Accounts
  3. SelectAccess work or school
  4. Find the account that you can’t use and select Disconnect
  5. In the popup for login, type your local administrator credentials or your office 365 global administrator email address with the password.
  6. Restart the computer and login
  7. Try to login to Office again using your regular username and password.

Note: you may lose your local computer profiles.

Resolution 3: Delete the problematic account

If disconnecting the account didn’t work, you can try to delete it from your computer.

  1. Launch the Settingsapp
  2. Navigate to Accounts
  3. Select the Access work or school option
  4. Delete the account
  5. Restart the computer and login
  6. Sign into your Outlook profile again.

Resolution 4:  Remove the device completely

This solution is a complex one. Use it only if you’re an advanced user or an IT admin.

  1. Disable group policy for automatic device registration.
    • If the respective setting is already configured in your environment, you should find it on the machine. If the entry is not available, that means it’s not configured on your machine and you don’t need to do anything.
  2. Download the Psexec tooland extract it to the PSTools folder
  3. Launch Command Prompt as an administrator
  4. Open the PSexec folder
  5. Run the psexec -sid cmd.execommand
  6. A new command prompt will appear on the screen (in a system context)
  7. To un-register the device, run the dsregcmd /leavecommand
  8. Restart your machine
  9. Check your machine’s status using dsregcmd /status.

Resolution 5: Remove the account and the device

This solution is some sort of a hybrid between the third and the fourth solutions. For some users, utilizing the respective solutions individually didn’t work. But they were able to fix the problem after combining steps from both the methods.

Here’s what you need to do:

  1. Go to Settings → Accounts → Access Work or School and remove the account
  2. Launch Command Prompt or PowerShell as an administrator
  3. Enter the dsregcmd /leavecommand
  4. Enter the dsregcmd /statuscommand to make sure the device no longer appears listed under Azure AD
  5. Register the problematic device again.

Resolution 6: unregister a device from Azure AD

For hybrid Azure AD joined devices, make sure to turn off automatic registration. Then the scheduled task doesn’t register the device again. Next, open a command prompt as an administrator and enter dsregcmd.exe /debug /leave.

Note: Deleting devices in your on-premises AD or Azure AD does not remove registration on the client. It will only prevent access to resources using device as an identity (e.g. Conditional Access). Read additional information on how to remove registration on the client.


You can’t sign in here with a work or school account

Situation: When attempting to sing Microsoft Teams using your work email, you may receive this message: You can’t sign in here with a work or school account.

There are two Microsoft Teams, one for work and another for personal. If you type teams in the search, they are popup. Select Microsoft Teams (work or school).


Can’t wake up laptop from sleep mode, despite the power LED being on

Resolution 1: Close the screen meaning put the screen down to the keyboard. Then open it again. If the screen doesn’t display and the power led is on, press Enter key. If the power led is off, press the power key to turn it on.

Resolution 2: Press the power key to turn off the power led. Then turn it on.

Resolution 3: Disconnect external devices: Disconnect any external devices connected to your laptop, such as USB drives, printers, or docking stations. Sometimes, these devices can interfere with the wake-up process.

Resolution 4: Update drivers: Outdated or incompatible drivers can cause sleep mode issues. Visit the manufacturer’s website of your laptop and download the latest drivers for your hardware components, especially the display and power-related drivers.

Resolution 5: Adjust BIOS/UEFI settings: Enter your laptop’s BIOS/UEFI settings by pressing a specific key during startup (often displayed on the screen). Look for any power-related settings that may affect sleep mode behavior and adjust them accordingly. Be cautious while making changes in the BIOS settings, as it can impact the system’s functionality if not done correctly.

Resolution 6:Perform a power cycle: Shut down your laptop completely, unplug the power cord, and remove the battery (if it’s removable). Press and hold the power button for about 15 seconds. Then, reconnect the battery and power cord, and turn on the laptop to see if it resolves the issue.