- With Palo open, go to Network >Interface > Tunnel, click Add to create a new tunnel interface and enter the following info:
Name: tunnel.1
Comment: Chicagotech VPN or any comment.
Virtual router: Default or any existing virtual router you have.
Security Zone: DMZ (It must be the layer 3 internal zone from which the traffic will originate)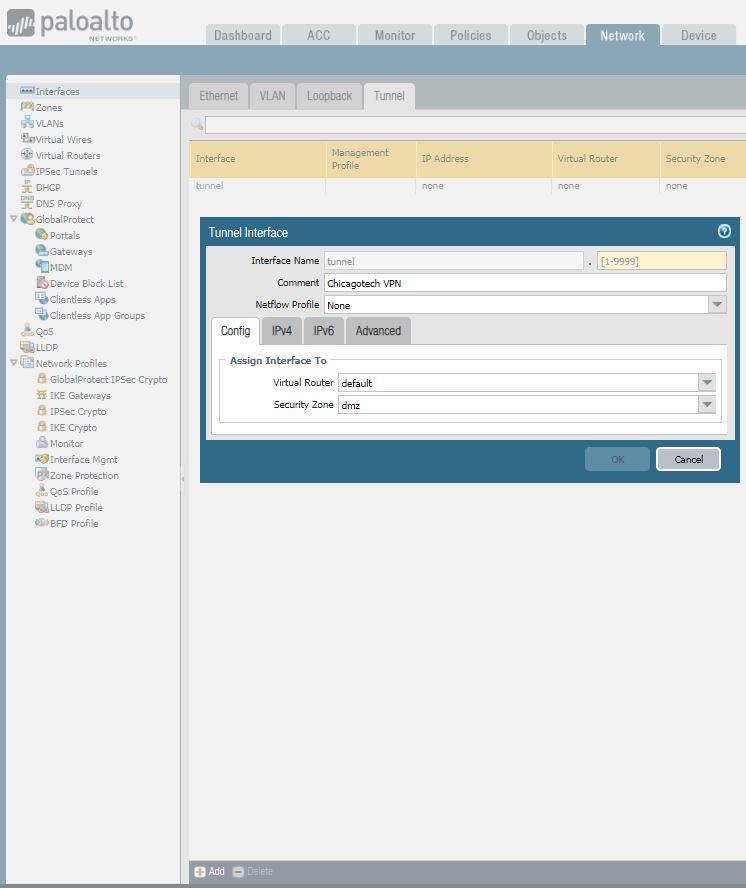 2. Go to Network > Network Profiles > IKE Crypto , click Add and enter the IKE Crypto profile (IKEv1 Phase-1) parameters. These parameters should match on the other site firewall for the IKE Phase-1 negotiation to be successful.
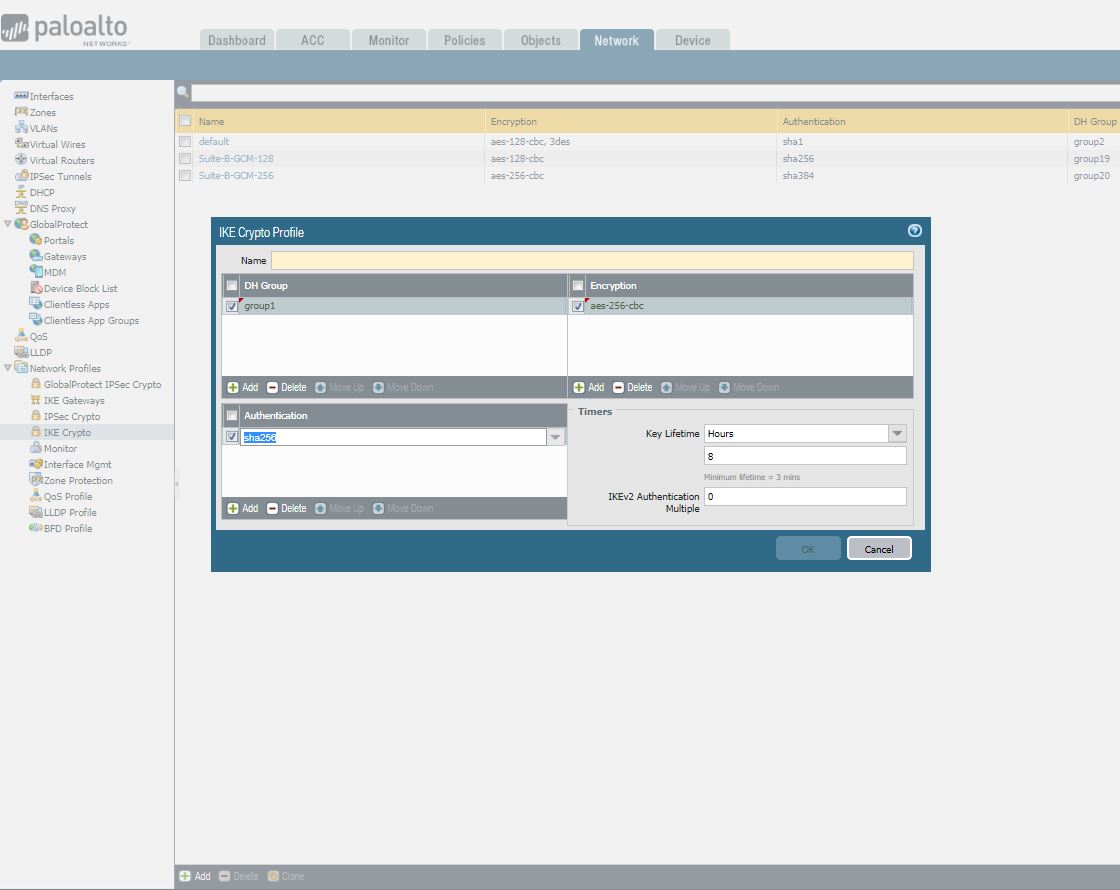
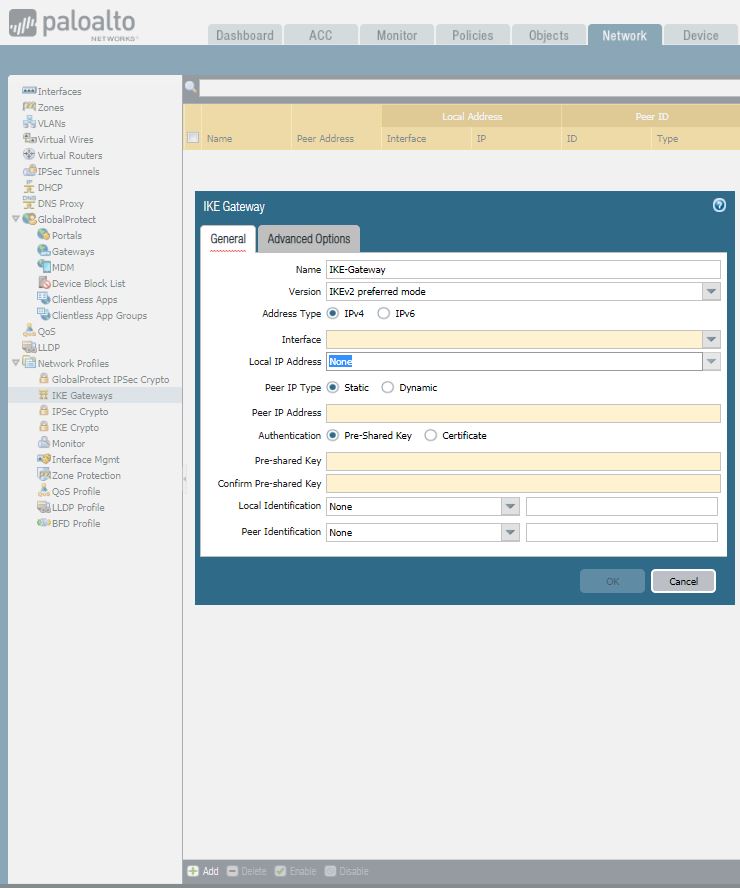
3. Go to Network > Network Profiles > IKE Gateway to configure the IKE Phase-1 Gateway. There are 3 options for the Version where you can select IKEv1 only mode, IKEv2 only mode or IKEv2 preferred mode. Two sites must use the same mode, for example IKEv2 preferred mode. Enter al other info.
4. Under Network > Network Profiles > IPSec Crypto , click Add to create a new Profile, define the IPSec Crypto profile to specify protocols and algorithms for identification, authentication, and encryption in VPN tunnels based on IPSec SA negotiation (IKEv1 Phase-2). These parameters should match on the remote firewall for the IKE Phase-2 negotiation to be successful.

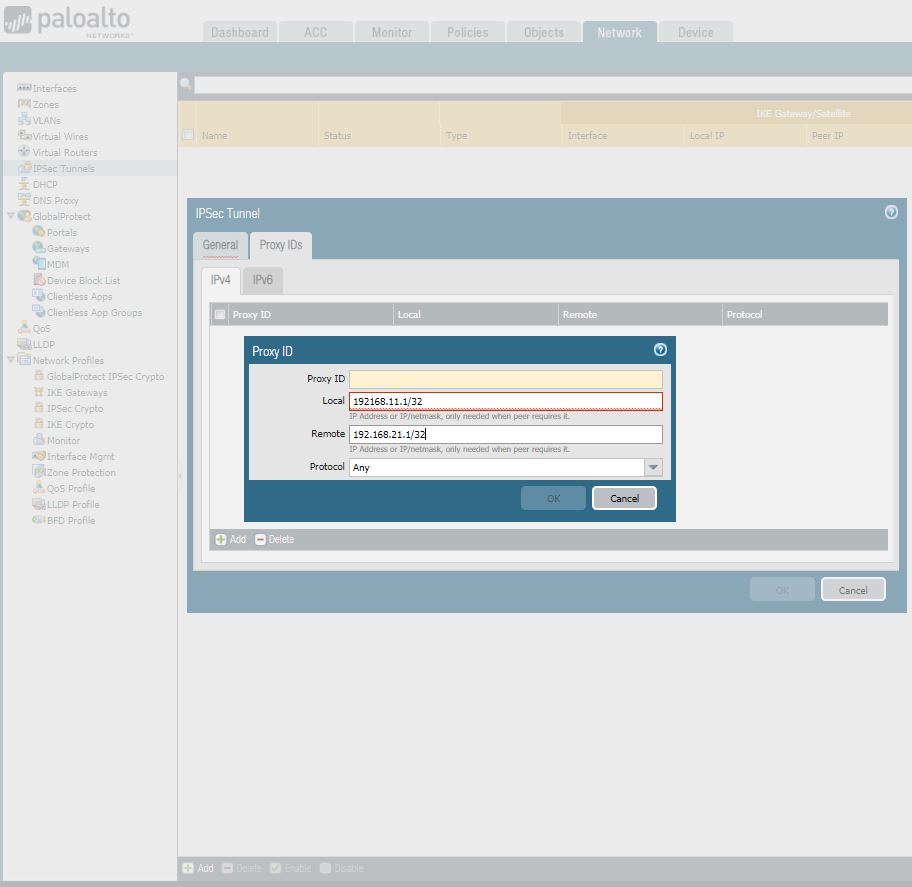
5. Under Network > IPSec Tunnels, click Add to create a new IPSec Tunnel. In the General window use the Tunnel Interface, the IKE Gateway and IPSec Crypto Profile from above to set up the parameters to establish IPSec VPN tunnels between firewalls.

6. When configuring an IPSec Tunnel Proxy-ID configuration to identify local and remote IP networks for traffic that is NATed, the Proxy-ID configuration for the IPSec Tunnel must be configured with the Post-NAT IP network information, because the Proxy-ID information defines the networks that will be allowed through the tunnel on both sides for the IPSec configuration.
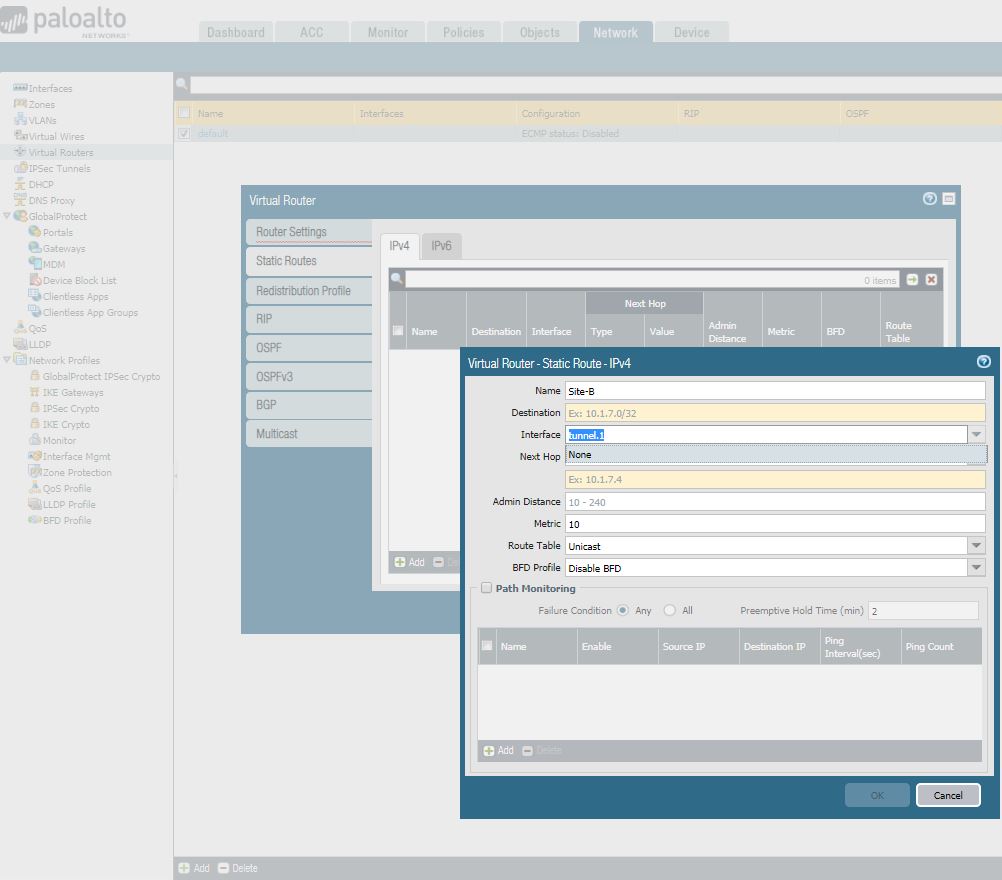
7. Under Network > Virtual Routers, click on your Virtual router profile, then click Static Routes, add a new route for the network that is behind the other VPN endpoint. Be sure to use the proper Tunnel Interface. Click OK when done.
8. Save all settings.